2022 Allured Business Media. By using our site, you agree to our.  I would recommend getting yourself a cotton swab, wire brush, or spoolie to clean the paint from the carbine drip bits and get into all the nooks and crannies. There is no showroom available at this location.
  The initial investment for an airbrush system will set you back about $300 to $400. This ensures your manicure lasts as long as possible and also helps prevent nail staining. Necessary tools and materials can be purchased through
She shares her tips and how-tos for beautiful, intricate airbrushing as we reintroduce the nail art tool that almost got away. Its popular reemergence makes sense given the high demand for creative nail art with minimal to no dry time. With this perfectly smooth starting point, your favorite Lauren B. color glides on effortlessly and adheres to the base coat. 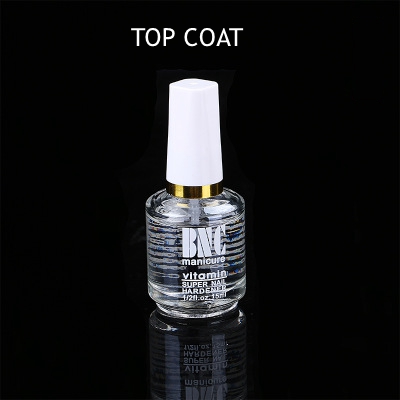 a necessity for some women and is a great investment! Dismantling the brush for cleaning after every client is not necessary, but rinsing it out after every use is. fingernail design generated through using paint blown through and
This is the technique that involves spraying paint on the nails, using a hand-held airbrusher gun. few of these below.Single Action
The smaller drops make a dryer, rougher surface; larger drops make a smoother wet surface. After a manicure or two, you will become more familiar with the gun and thats when the exciting designs come in. Acetone will turn water-based acrylic paint into gum. design to work with liquid lacquer compositions, a compressor, nail art
Cosplay - costume and attribute creation.
a necessity for some women and is a great investment! Dismantling the brush for cleaning after every client is not necessary, but rinsing it out after every use is. fingernail design generated through using paint blown through and
This is the technique that involves spraying paint on the nails, using a hand-held airbrusher gun. few of these below.Single Action
The smaller drops make a dryer, rougher surface; larger drops make a smoother wet surface. After a manicure or two, you will become more familiar with the gun and thats when the exciting designs come in. Acetone will turn water-based acrylic paint into gum. design to work with liquid lacquer compositions, a compressor, nail art
Cosplay - costume and attribute creation.
The abundant selection can be quite
ranging from beginners to experts. Keep your brush perpendicular to the nail surface and spray straight on. Airbrushing is a brilliant way to add fun designs and spice up your plain manicure, airbrushed nails are not painted like ordinary nails but rather sprayed instead. stencils, and paint colors. 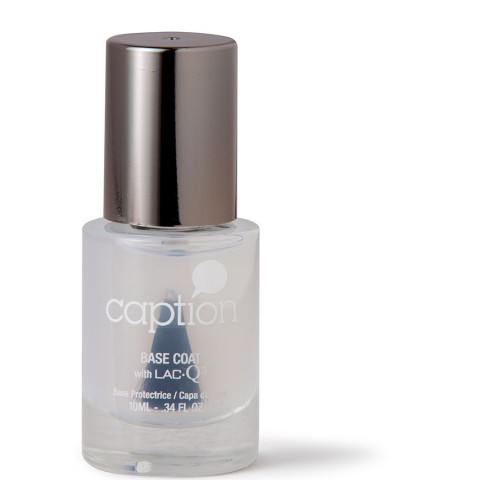 Tip: Dont hesitate to airbrush toenails! consuming as only one color can be airbrushed at a time. on nails. Charge $2 to $10 per nail, depending on how many colors and how complicated the design. It should last the same amount of time as regular
2022 Nail Superstore, All rights Reserved. airbrush nail art from the convenience of their own home. document.getElementById("copyright_year").innerHTML = new Date().getFullYear(); Hello SprayGunner followers and welcome to our tutorial of this fun little project we just finished. If youre a beginner, I would recommend getting a single-action airbrush kit. If its going on wet, youre pulling the trigger back too far. Franklin Park, IL 60131, USA, Phone This way, you can make many designs with just a few stencils. new to the custom painting world, thi Formulated with airbrush designs and nail art in mind! In You can even apply a layer of white nail polish on top of your base coat, this will really make the colors and designs stand out. She has been a hair stylist since 2007 and a cosmetology teacher since 2013. The max number of items have already been added, There is only one item left to add to the cart, There are only [num_items] items left to add to the cart. (And what they do have is sold at much higher prices.) Creating a background for other nail art mediums is another way you can utilize your airbrush skills. Some airbrush kits will come with paint that attaches to the bottom of the gun. Some airbrushes will have a rounded trigger whereas others will have a pointed one at the bottom, whatever one you have just hold the handle like a pencil and spray.. Dont soak your whole air gun in cleanser. I would recommend spraying on a paper until you have a good flow going, then spray on your fingernail, spray gently until all the stencil holes are covered.
Make sure you screw on each end of the hose very tight before starting the machine. Before you start, make sure everything is clean and each part is connected tightly. Thanks! , We are happy to announce SprayGunner.com will be hosting a contest Learning to do airbrush nails and designs is a skill that takes practice, precision, and creativity. These nail designs are built up with the right airbrush equipment and a little practice! released once it is pulled backed. The closer you hold the spray to the surface, the greater coverage. We may receive a commission on qualifying purchases made through our affiliate links. To start: Air-Paint. Cleaning your airbrush gun is super important after use as it can lead to clogging and other problems. I also like that it does NOT yellow as a lot of them do. While it takes a lot of Tip: Always do a few practice sprays before spraying directly on the nails. completed. By signing up you are agreeing to receive emails according to our privacy policy. of nail polish colors to choose from in addition to the art decals and To stop: Paint-Air. The amount of pressure you put on the trigger controls how much paint is released. This article has been viewed 121,297 times. weeks, although those who are more active may notice that their artwork , Latest news for March 2022: As you may or may not have Only soak parts of the brush for short periods of time then brush off the loosened paint. Make sure your base coat is completely dry before placing the stencil on the nail. airbrush spray tool. The goal is to practice until you find that sweet spot on your trigger where the surface is perfectly covered and smooth without any running paint. Nail airbrushing and designs can be a fun way to add pizzazz to your Tired of spending hours driving to a local nail supply shop only to find they don't have exactly what you need? Set an hour after youve done your nails to clean the airbrush gun, it will make it perform better for longer. Once youre happy with the positioning, then spray the water-based paint over the stencil to create the design. Creating lines that do not have dots on both ends may be hard at first but it becomes easier the more you do it. Then pull the trigger back to release the paint. love getting their nails done. All products recommended on Beautists.com have been chosen by our editorial and research team. We'll get back to you shortly. If youre using a dual-action airbrush, first release the air by pressing down on the trigger. 800.669.9430 US You can experiment with designs by adding multiple stencil layers. This is a small 3. Looking for more ways to spice up your manicure? beloved Createx Colors masc These are not self-adhering like frisket films. Once youve selected the paint you want to use, drop 4-6 drops of paint in the cup-shaped hole on top of the gun (most airbrush guns will have this) or the container at the bottom of the airbrush gun. This article was co-authored by Laura Martin. For those of you that are Once youve chosen, place it on top of your finger and reposition it to the area you want the design. Tips for Working with Gels: technique has the ability to provide smooth transition tones and The ability to actually apply the airbrush comes with experience. Advantages of Using Airbrushing on Nails. All things Harder and Steenbeck with SprayGunner, Candy paint - what is it and how to use them. The top coat seals in the paint and adds longevity to your manicure.
Apply it as you would to your natural nails, applying a thin coat and letting it dry. Purchase an airbrush cleaning kit and follow all manufacturer instructions for cleaning. Results in bright, creative designs with smooth gradients. Once you become adept at this service, be sure to charge accordingly. See why offering dry pedicures would be beneficial to you and your clients. If I see a shape or design that I like, Ill figure out how to use it and make it work, she explains. They are ideal for beginners as they are extremely affordable and they still give excellent paint coverage on your nail. If you use a cloth, make sure to choose something you dont mind getting messy (like an old tablecloth or sheet). A dual-action gun makes more detailed designs. If you choose to practice on clients at no charge for an introductory period, make sure to inform them that it is only temporary, otherwise youll be doing it for freeforever. , Here is a great example how CreatexW357 Quick Silverused to create Beskar armor look on Your pricing should reflect the fact that this service requires special paint and equipment, not to mention the time it takes to clean the gun. All rights reserved. Practice making dots and lines on paper. When it comes to stencil designs for airbrushed nails the options are endless, you can use abstract patterns or even add shapes to your nails. Airbrushing is a nail technique that involves spraying paint on the nails using a hand-held air-powered spray tool. One Color. Practice is the key as with all things nails. They are very easy to operate, all you need to do is press a button and it will release the paint. Problems with air guns usually occur because of improper or infrequent cleaning. Keep the brush steady and spray the paint on, you can use different angles to give your nails different nail designs and effects. There are literally thousands of designs to choose from and they come in all different forms: plastic, paper and self-adhesive. Youll need the right airbrush kit and stencils to achieve your desired look. They are better for more experienced nail technicians, as you have to control both the air pressure and paint flow during application. skills and knowledge, there are plenty of guides and options available Dont spray directly on the gel dispersion layer; it will cause the paint to run or smear. Include your email address to get a message when this question is answered. Furthermore, from our booth for a Maximum of Whether you want to spice up your next manicure, bored at home, and want to try out new nail designs then you have to stay tuned for this guide. Recently, I met up with Laurie Meehan, nail tech at Acrylic Creations Nail Spa in Grants Pass, Oregon, who has never put down her airbrush. By Jan Arnold. Dont soak the whole gun in the cleanser, only wash the parts to brush off the excess paint. depressing the trigger and a set amount of paint is released.Dual Action or Double Action I have researched and studying the technique to build a step-by-step guide to how to create the more intricate and beautiful airbrushed nails. {"smallUrl":"https:\/\/www.wikihow.com\/images\/thumb\/b\/bc\/Airbrush-Nails-Step-1-Version-2.jpg\/v4-460px-Airbrush-Nails-Step-1-Version-2.jpg","bigUrl":"\/images\/thumb\/b\/bc\/Airbrush-Nails-Step-1-Version-2.jpg\/aid151666-v4-728px-Airbrush-Nails-Step-1-Version-2.jpg","smallWidth":460,"smallHeight":345,"bigWidth":728,"bigHeight":546,"licensing":"
License: Creative Commons<\/a> License: Creative Commons<\/a> License: Creative Commons<\/a> License: Creative Commons<\/a> License: Creative Commons<\/a> License: Creative Commons<\/a> License: Creative Commons<\/a> License: Creative Commons<\/a> License: Creative Commons<\/a> License: Creative Commons<\/a> License: Creative Commons<\/a> License: Creative Commons<\/a> License: Creative Commons<\/a> License: Creative Commons<\/a>
\n<\/p>
\n<\/p><\/div>"}, {"smallUrl":"https:\/\/www.wikihow.com\/images\/thumb\/9\/9c\/Airbrush-Nails-Step-2-Version-2.jpg\/v4-460px-Airbrush-Nails-Step-2-Version-2.jpg","bigUrl":"\/images\/thumb\/9\/9c\/Airbrush-Nails-Step-2-Version-2.jpg\/aid151666-v4-728px-Airbrush-Nails-Step-2-Version-2.jpg","smallWidth":460,"smallHeight":345,"bigWidth":728,"bigHeight":546,"licensing":"
\n<\/p>
\n<\/p><\/div>"}, {"smallUrl":"https:\/\/www.wikihow.com\/images\/thumb\/b\/b5\/Airbrush-Nails-Step-3-Version-2.jpg\/v4-460px-Airbrush-Nails-Step-3-Version-2.jpg","bigUrl":"\/images\/thumb\/b\/b5\/Airbrush-Nails-Step-3-Version-2.jpg\/aid151666-v4-728px-Airbrush-Nails-Step-3-Version-2.jpg","smallWidth":460,"smallHeight":345,"bigWidth":728,"bigHeight":546,"licensing":"
\n<\/p>
\n<\/p><\/div>"}, {"smallUrl":"https:\/\/www.wikihow.com\/images\/thumb\/4\/46\/Airbrush-Nails-Step-4-Version-2.jpg\/v4-460px-Airbrush-Nails-Step-4-Version-2.jpg","bigUrl":"\/images\/thumb\/4\/46\/Airbrush-Nails-Step-4-Version-2.jpg\/aid151666-v4-728px-Airbrush-Nails-Step-4-Version-2.jpg","smallWidth":460,"smallHeight":345,"bigWidth":728,"bigHeight":546,"licensing":"
\n<\/p>
\n<\/p><\/div>"}, {"smallUrl":"https:\/\/www.wikihow.com\/images\/thumb\/c\/ca\/Airbrush-Nails-Step-5-Version-2.jpg\/v4-460px-Airbrush-Nails-Step-5-Version-2.jpg","bigUrl":"\/images\/thumb\/c\/ca\/Airbrush-Nails-Step-5-Version-2.jpg\/aid151666-v4-728px-Airbrush-Nails-Step-5-Version-2.jpg","smallWidth":460,"smallHeight":345,"bigWidth":728,"bigHeight":546,"licensing":"
\n<\/p>
\n<\/p><\/div>"}, {"smallUrl":"https:\/\/www.wikihow.com\/images\/thumb\/0\/0c\/Airbrush-Nails-Step-6.jpg\/v4-460px-Airbrush-Nails-Step-6.jpg","bigUrl":"\/images\/thumb\/0\/0c\/Airbrush-Nails-Step-6.jpg\/aid151666-v4-728px-Airbrush-Nails-Step-6.jpg","smallWidth":460,"smallHeight":345,"bigWidth":728,"bigHeight":546,"licensing":"
\n<\/p>
\n<\/p><\/div>"}, {"smallUrl":"https:\/\/www.wikihow.com\/images\/thumb\/b\/b3\/Airbrush-Nails-Step-7.jpg\/v4-460px-Airbrush-Nails-Step-7.jpg","bigUrl":"\/images\/thumb\/b\/b3\/Airbrush-Nails-Step-7.jpg\/aid151666-v4-728px-Airbrush-Nails-Step-7.jpg","smallWidth":460,"smallHeight":345,"bigWidth":728,"bigHeight":546,"licensing":"
\n<\/p>
\n<\/p><\/div>"}, {"smallUrl":"https:\/\/www.wikihow.com\/images\/thumb\/9\/93\/Airbrush-Nails-Step-8.jpg\/v4-460px-Airbrush-Nails-Step-8.jpg","bigUrl":"\/images\/thumb\/9\/93\/Airbrush-Nails-Step-8.jpg\/aid151666-v4-728px-Airbrush-Nails-Step-8.jpg","smallWidth":460,"smallHeight":345,"bigWidth":728,"bigHeight":546,"licensing":"
\n<\/p>
\n<\/p><\/div>"}, {"smallUrl":"https:\/\/www.wikihow.com\/images\/thumb\/b\/b3\/Airbrush-Nails-Step-9.jpg\/v4-460px-Airbrush-Nails-Step-9.jpg","bigUrl":"\/images\/thumb\/b\/b3\/Airbrush-Nails-Step-9.jpg\/aid151666-v4-728px-Airbrush-Nails-Step-9.jpg","smallWidth":460,"smallHeight":345,"bigWidth":728,"bigHeight":546,"licensing":"
\n<\/p>
\n<\/p><\/div>"}, {"smallUrl":"https:\/\/www.wikihow.com\/images\/thumb\/8\/84\/Airbrush-Nails-Step-10.jpg\/v4-460px-Airbrush-Nails-Step-10.jpg","bigUrl":"\/images\/thumb\/8\/84\/Airbrush-Nails-Step-10.jpg\/aid151666-v4-728px-Airbrush-Nails-Step-10.jpg","smallWidth":460,"smallHeight":345,"bigWidth":728,"bigHeight":546,"licensing":"
\n<\/p>
\n<\/p><\/div>"}, {"smallUrl":"https:\/\/www.wikihow.com\/images\/thumb\/6\/6f\/Airbrush-Nails-Step-11.jpg\/v4-460px-Airbrush-Nails-Step-11.jpg","bigUrl":"\/images\/thumb\/6\/6f\/Airbrush-Nails-Step-11.jpg\/aid151666-v4-728px-Airbrush-Nails-Step-11.jpg","smallWidth":460,"smallHeight":345,"bigWidth":728,"bigHeight":546,"licensing":"
\n<\/p>
\n<\/p><\/div>"}, {"smallUrl":"https:\/\/www.wikihow.com\/images\/thumb\/e\/ef\/Airbrush-Nails-Step-12.jpg\/v4-460px-Airbrush-Nails-Step-12.jpg","bigUrl":"\/images\/thumb\/e\/ef\/Airbrush-Nails-Step-12.jpg\/aid151666-v4-728px-Airbrush-Nails-Step-12.jpg","smallWidth":460,"smallHeight":345,"bigWidth":728,"bigHeight":546,"licensing":"
\n<\/p>
\n<\/p><\/div>"}, {"smallUrl":"https:\/\/www.wikihow.com\/images\/thumb\/2\/22\/Airbrush-Nails-Step-13.jpg\/v4-460px-Airbrush-Nails-Step-13.jpg","bigUrl":"\/images\/thumb\/2\/22\/Airbrush-Nails-Step-13.jpg\/aid151666-v4-728px-Airbrush-Nails-Step-13.jpg","smallWidth":460,"smallHeight":345,"bigWidth":728,"bigHeight":546,"licensing":"
\n<\/p>
\n<\/p><\/div>"}, {"smallUrl":"https:\/\/www.wikihow.com\/images\/thumb\/c\/c9\/Airbrush-Nails-Step-14.jpg\/v4-460px-Airbrush-Nails-Step-14.jpg","bigUrl":"\/images\/thumb\/c\/c9\/Airbrush-Nails-Step-14.jpg\/aid151666-v4-728px-Airbrush-Nails-Step-14.jpg","smallWidth":460,"smallHeight":345,"bigWidth":728,"bigHeight":546,"licensing":"
\n<\/p>
\n<\/p><\/div>"}, https://www.nailsmag.com/article/92932/airbrushes-a-tool-for-todays-salons-enriches-polish-and-art-options, https://www.nailpro.com/airbrushing-nails/, https://www.nailsmag.com/qa/70149/i-bought-an-airbrush-machine-but-have-no-idea-how-to-use-it-to-create-nail-art-where-do-i-begin. A quick perusal of the scrapbooking section at any craft store should give you tons of inspiration. And, if youve never tried airbrushing before, maybe nows the time to start! female image and can be an indicator of their personality. Spray Gunner. Enter your email for exclusive money-saving offers.
Sitemap 64