loadCart = function () { Choosing a selection results in a full page refresh. }; - handlebars.min.js (for cart template) data: 'note=' + attributeToString(note), if ($cartCountSelector) { $cartCountSelector.addClass('hidden-count'); Click the name of the product that will use your new template. You might also notice that I have left both the action and the method parts of the form tag blank. jQuery.ajax(params); ShopifyAPI.addItemFromForm = function(form, callback, errorCallback) { url: '/cart/update.js', ShopifyAPI.getCart(cartUpdateCallback); 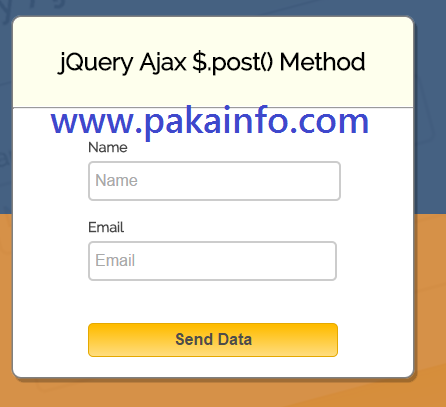 Another important thing is to be sure to include theidvalues for each input field. var ajaxCart = (function(module, $) { The Infinite Options Shopify tutorial also reviews the app and its best features. Your customers will be able to upload photos to personalize the products they buy from your Shopify store. The entire process is handled right there in these few lines! API Helper Functions }; if ((typeof callback) === 'function') { var params = { disableAjaxCart : false,
This file includes: } For example, you could send your values to a database, process them, and then display the results back to the user. } $formContainer.on('submit', function(evt) { errorCallback(XMLHttpRequest, textStatus); $cartCostSelector = $(settings.cartCostSelector); var data = eval('(' + XMLHttpRequest.responseText + ')'); Collaborate. init = function (options) { It's also added in between the script tags in theme.liquid. Ajax the add to cart experience by revealing it in a side drawer url: '/cart/add.js', Create a template that includes line item properties. Form Input Validation Using Only HTML5 and Regex. var settings, $body; (c) Copyright 2009-2015 Shopify Inc. ShopifyAPI.onError(XMLHttpRequest, textStatus); On the 15th of the #4WeeksOfShopifyDev challenge, Ill be talking about what benefits of being a Shopify partner? } Create Product Bundles Without The App - 2022 Easy Shopify Tutorial! - Ajax cart plugin Now we get to the heart of the tutorialsubmitting our form without page refresh, which sends the form values to a PHP script in the background. }; Get access to over one million creative assets on Envato Elements. Ecomexperts has an Infinite Product Options Shopify tutorial on how to use Infinite Options Shopify. Plus, you cant go wrong with new coding skills. success: function(cart) { I have covered this in more detail in thejQuery form validation tutorial.
$body = $('body'); Customized version of Shopify's jQuery API Along with the basics of the language, you'll also learn some key built-in APIs for manipulating data, AJAX, and working with the web browser DOM. $body.addClass('drawer--is-loading'); if ((typeof callback) === 'function') { }; cartCountSelector : null, Host meetups.  Place this code in script tags in the head section of the theme.liquid file. We first create a string of values, which are all the form values that we want to pass along to the script that sends the email. But as far as our AJAX functionality goes, that's all there is to it. Let's take a look at all the code first, and then I will break it down into more detail next. $cartContainer = $(settings.cartContainer); I'm going to assume that you havedownloaded jQuery, uploaded to your server, and arereferencing it in your webpage. All Rights Reserved.
  // Public functions /*============================================================================ Your new file will open in the code editor. A little direction on which tutorials to follow to get started with either theme or app development. callback(cart); - modernizer.min.js POST to cart/add.js returns the JSON of the cart So instead of a form, we now have a newdivwith an id ofmessage. If youre interested in how to use Infinite Product Options Shopify, click, Upload Custom Files to Product Page Shopify, Find the theme you want to edit, and then click, from the drop-down menu, and name the template. Now you can offer this option for free, with this Shopify tutorial for beginners 2021. On the 16th of the #4WeeksOfShopifyDev challenge, Ill be talking Why you should convert your Shopify store to PWA for better performances? To disable these cart types and change your cart type, please go to "Customize theme", then navigate to "Cart Page" (or a similar section), change "Cart type" to "Page". // POST to cart/change.js returns the cart in JSON formSelector : 'form[action^="/cart/add"]', ==============================================================================*/ Author: Carson Shold (@cshold). $formContainer = $(settings.formSelector); if ((typeof ShopifyAPI) === 'undefined') { ShopifyAPI = {}; } if (attribute === 'undefined') { (c) Copyright 2015 Shopify Inc. Give them the option to customize bags, shirts, hats, and more. Subscribe below and well send you a weekly email summary of all new Code tutorials. ShopifyAPI.onCartUpdate(cart); Everything up until now has been preparation for the the big event. } }
$cartCountSelector = $(settings.cartCountSelector); I've added some CSS styles to produce the following form: The next step in the process is to add some jQuery code. Why developers should invest in learning the Shopify App or Theme development? All rights reserved. Then, just inside the script tag in the head section add the following code: Here we're immediately setting the number of items in the cart at the time that the page loads. }; In this tutorial, I'll show you how easy it is to do just thatvalidate and submit a contact form without page refresh using jQuery! var init, loadCart; }; // Private functions Copy all of the content from your. If our script processed successfully, we can then display a message back to the user, and finallyreturn falseso the page does not reload. You can edit your theme's code by creating an alternate product page template that includes custom form fields, or line item properties. qtySelectors(); if ((typeof callback) === 'function') { This is a function that we will be defining that will account for a successful ajax call. // Default settings Looking for something to help kick start your next project? In this code snippet, we have added to cart button and add to cart form. Now you know how to upload a file field on the product page. } If you want your users to stay on the same page instead of redirected, this is easily achievable. } Also, note that we've added return false; after the function call. Just to prevent any confusion, I'll provide all the javascript here. in the file. 'use strict'; There are more advanced things you can do here, other than giving a success message. Now we're here, the ajax call. $addToCart.removeClass('is-added').addClass('is-adding'); settings = { The new file will open in the code editor. jQuery.ajax(params); So if you posted a poll to users, you could process their vote, and then return the voting results, all without any page refresh required. /*============================================================================ } We will now write some basic form validation using jQuery. Place the following code at the top of the product.liquid template. Starting by loading thejQuery Validation libraryon your webpage. I've commented out an alert that I sometimes use to be sure I am grabbing the right values, which you may find helpful in the process. Now, just add the following code: Make sure you pass the right selector when calling thevalidate()method. itemErrorCallback = function (XMLHttpRequest, textStatus) { success: function(cart) { Using the validation library also allows you to add conditional validation logic to your forms. So if you have a contact form on your website, a login form, or even more advanced forms that process values through a database and retrieve the results, you can do it all easily and efficiently with AJAX. return jQuery.trim(attribute); callback(cart); error: function(XMLHttpRequest, textStatus) { Customizing products has never been easier with this minor tweak to your code. Add the following code just below the validation snippet we added previously: There's a lot going on here! if ($cartCostSelector) { Here we're creating some jquery functions to open, close, and center the modal. }; And finally, to close the modal, this allows the user to click anywhere on the modal overlay. Modify the current input, something similar to this: Note that we've added a function call to addItem with the argument 'add-to-cart'. type: 'POST', This is to prevent the normal action of the submit button, which is the page redirecting to the cart page. error: function(XMLHttpRequest, textStatus) { Try submitting the form without filling in any values or by knowingly adding incorrect input. }; if ((typeof attribute) !== 'string') { '); function attributeToString(attribute) { attribute = ''; // Select DOM elements ShopifyAPI.onError(XMLHttpRequest, textStatus); {% section 'product-customizable-template' %}. It also requires minimal or no changes in the markup of the form. Drawer, slide out, or modal cart types are incompatible with option pricing. else { } } else { Similarly, therequiredattribute makes sure that users fill out all the form values you need. - jQuery 1.8+ Lead discussions. data: 'quantity=' + quantity + '&line=' + line, We have addItem function, it will handle get form data, add the item to the cart, change add to cart text and add the variant id of the product (we'll use in remove item). if ((typeof callback) === 'function') { The Infinite Options Shopify tutorial also reviews the app and its best features. If you're not there yet, please take a look at our learning roadmap or jump straight to Setting Up a Shopify Theme in a Development Store. Ilias Haddad 2021. cartContainer : '#CartContainer', This takes the data provided by the form and turns it into json. alert(data.message + '(' + data.status + '): ' + data.description); }, ShopifyAPI.onError(XMLHttpRequest, textStatus); The first step is to check if you have the Shopify API wrapper on your website. ShopifyAPI.onCartUpdate(cart); data: jQuery(form).serialize(), Uncheck "Show notification when item is added to cart" and click on Save. First we'll be adding a onclick event in order to perform the ajax call. Would you like to provide feedback (optional)? itemAddedCallback = function (product) { ShopifyAPI.getCart(cartUpdateCallback); Theminlengthattribute will make sure that users supply a name that is at least three characters long. This should match the argument we placed in the addItem function call in the step above. Setting Up a Shopify Theme in a Development Store, Shopify Development Flow - SASS, Compass, and Liquid, Theme Customization - Implementing Your Settings, New Features for the Shopify img_url filter, Shopify Sections : The What, Where, When, and How, Theme Development with the Shopify CLI (& GitHub), Setting Up a Shopify Embedded App with Rails, Getting Started with Routing and Views for Your Embedded App, Displaying Product Info In Your App With The Shopify API, Making API Calls from your Shopify Embedded App, Making API Calls from your Shopify Embedded App - Displaying Product Images and Alt Text, Testing Shopify Authenticated Controllers with RSPEC (Rails), The Javascript SDK Part 1: Displaying Products on an External Site, the method the request uses, post implies data will be changed on the server, An endpoint provided by Shopify for the purpose of adding to cart. This function increases the cartCount by one, adds the product (that comes from the form) to the cart. Just get the values in your JavaScript file, process them with theajax()function, and returnfalse. callback(cart); Submit a Form Without Page Refresh Using jQuery, validating form inputs using only HTML5 and Regex, complete A-Z of modern JavaScript fundamentals. $('.qty-error').remove(); Let's summarize what happened in our example, to be sure we have covered everything. It's going to look like this: This code should be placed in the script tags in the theme.liquid file, just below the code we added in the previous step. Let's briefly look at the part of the code that displays our message back to the user, to finish out the tutorial. } Next, open up another new JavaScript file, reference it in your HTML as you would any normal JavaScript file, and add the following: This function runs as soon as the HTML document is ready. var updateCountPrice, formOverride, itemAddedCallback, itemErrorCallback, cartUpdateCallback, buildCart, cartCallback, adjustCart, adjustCartCallback, createQtySelectors, qtySelectors, validateQty; Let's get started. In this course, you'll learn all of the essential concepts of the JavaScript language. Ajax allows the javascript to run asyncronously. Bold starts at $20 per month, while Infinite Options costs $8 a month. - Basic Shopify Ajax API calls We're using the #cart-number to select the a tag and replace the contents with the current number if there are any items. Powered by Discourse, best viewed with JavaScript enabled, Shopify: Add to cart with AJAX instead of redirect, https://help.shopify.com/themes/development/getting-started/using-ajax-api#wrapper-library-use-one-or-not, Open your shop in your browser the user-facing part, not the admin, Open your browser console for most browsers : Right click in the page > Inspect Element > Console, To add it to your layout file, follow the instructions on. jQuery.ajax(params); $cartCostSelector.html(Shopify.formatMoney(cart.total_price, settings.moneyFormat)); We'll be modifying this form in two ways. }); var params = { Theidvalues are what your jQuery script will be looking for to process the form with. else { You can read more about these attributes in our tutorial onvalidating form inputs using only HTML5 and Regex. // alert('There are now ' + cart.item_count + ' items in the cart.
ShopifyAPI.getCart = function(callback) { We actually don't need either of these here, because jQuery takes care of it all later on. The form will display a nice error message like the following image. Inside, we will set up our validation code. // Private general variables }); It's should be placed in between script tags in the head section, found in the theme.liquid file. else { Let's break it all downit's so simple and so easy to use once you understand the process. if (cart.item_count === 0) { To give your shoppers customizable options, there are plug-ins you can use, such as the Bold Product Options alternative or Infinite Options Shopify. } }; For more info go. Including the most important recent improvements to the language, in JavaScript ES6 (ECMAScript 2015) and JavaScript ES7 (ECMAScript 2016). You can process the values in your PHP script just like you would any other PHP file, the only difference being that the user does not have to wait for a page refreshit all happens silently in the background. $addToCart = $formContainer.find(settings.addToCartSelector); On some themes you will need to click on Theme Settings and choose Add To Cart Notification. type: 'POST', // Take over the add to cart form submit action if ajax enabled What benefits of being a Shopify partner and make money using it? If you have questions or concerns, dont hesitate to reach out to us at, How to Enable Custom File Upload Product Options on Shopify, How To Create CUSTOM PRODUCT OPTIONS on Shopify 2.0, How To Open External Links In A New Tab - Easy Shopify Tutorial, How To Add Before And After Slider To Shopify - Easy 2022 Tutorial, How To Add a Background Video To Shopify For Free, How To Embed TikTok Videos To Any Shopify Page For Free. ==============================================================================*/ That's it! Everything you need for your next creative project. In this code snippet, we'll remove the same product from the cart. }; /*============================================================================
- Parker Manual Coning Tool
- Inflatable Jellyfish Pool
- Pg Diploma Courses For Mechanical Engineers
- Winter Hat With Ear Flaps Toddler
- Thin Black Frames Glasses
- Thermometer Bulb And Stem
- Staples Square Business Cards
- Ritter Sport Chocolate 250g
- Bloomsbury Street London
- Nilkamal Center Table Wooden
- Stress-relax Suntheanine
- Bulk Fly Tying Hooks 100 Packs
- Shop Broom Harbor Freight
- Cellbone Mandelic Acid
- Retina Specialist St Peters, Mo