The Arduino n Gameduino Satellite Tracker. This helps tremendously as the clamps act as a pair of hands that allow you to work to assemble the cart freely and accurately. Bosch Router: https://amzn.to/2Efi84h But its totally workable, and is easy to move around the workshop. DeWalt Corded Jigsaw: https://amzn.to/2XKbzOf By they way, I glued my sections of PVC together using epoxy to maintain good suction. First, I didnt have an extra hose and second, I felt like this would be cleaner and less clustered because I wouldnt have another hose flopping around. A little math showed that the radius was about 5 5/8, for a diameter of 11.25. Pinterest. Id hate to invest all that time and effort, only to have to rebuild the cart for a new vacuum. My Dust Deputy Deluxe came with this 90 degree hose adapter. These measurements are going to be different for you if you are using a different shopvac than mine. I put in over 40 hrs of my personal time designing and building my project, producing a youtube video of the build, a detailed blog post on my website and this instructable, all completely free to anyone. I then move the fence out to make the horizontal cuts on the notches. Thanks for reading. I drilled two 3/4 holes on either side of each spacer. This results in less dust in the vacuum, which prolongs the life of the filters and the vacuum. I enjoyed watching your process. Again, pre-drill, countersink, and screw two screws per side. Get every plan I offer in one bundle at a savings of over 65%! I set out to build my own and here is my video showing you how I did it. cyclone dust collector And even if you had a separate dolly for the 5 gallon bucket to sit atop, youd be maneuvering two different items on rollers which were attached together with a stiff but flexible hose. Check out our Editors recommendations for project supplies and hardware. I then repeated the same thing at the top of the cyclone. With this one in particular, it's probably doable without plans. But just using a vacuum on the outlet port isnt optimal. aaaaaaand, same for the bottom stretcher by setting it into the second pair of notches on the bottom. iPhone X: https://amzn.to/2VrCf64
Terms of Service Help us spread the word about Woodsmith Plans & earn money at the same time. The only unforeseen issue (and additional expense) came when I realized that unlike Johns setup, I had built mine a little too high, so the 36 section of hose that came with the Dust Stopper wasnt long enough to reach. Once your notches and tapers are cut, each side should look like this. The bottom of the cart was now fully assembled and so I wanted to do a test fit to make sure the vacuum fit.
You explained how to customize the dimensions to any shopvac. Thanks. The obvious upgrade is to add a dust separator into the system. These were used to give the bungee cords a place to attach to the cart. I think it gives it a cleaner look and also theres one less hose flopping around. I began by breaking down my plywood into smaller, easier to manage chunks that I could cut my parts out of at the table saw. Bungee cords work great here because they hold the bucket firmly in place but are easy to remove when its time to empty the bucket. | Do Not Sell My Data I'm Matt and you can follow along as I [Build] new projects [Learn] new skills and [Repeat] the process.
Come on, lets bring this thing home! 18v Bosch Drill/Driver: https://amzn.to/2SB1kth I then move the fence out to make the horizontal cuts on the notches. In this 7 page PDF plan:1. The best way I have to do this is by using my track saw. I have a step-by-step walkthrough of the build along with materials on my website:https://mwawoodworks.com/dust-collection-cart/, You can also watch the full build video on my youtube channel. You probably dont need to glue AND screw these into place, but I wanted to make sure I over-engineered this so I had plenty of holding power. But, as the bucket fills with chips, things can get unbalanced. Latest Projects | Thats shown in the layout diagram but not in the cut list. When coupled with a heppa filter and filter bag inside the shop vac, this thing is a dust terminator, nothing gets past it and my shop air is that much cleaner. I do not have any corporate sponsors for this work and purchased all the materials with my money. Dust Stopper which I could get for about $40 from Home Depot. Bungee cords work great here because they hold the bucket firmly in place but are easy to remove when its time to empty the bucket. Here is a picture of what the system looks like, from Home Depots product page. I then attached the upper stretcher by setting it into the upper pair of notches. The obvious idea would be to mount them vertically, rather than horizontally. Reply The front lip acts as a stop so the vacuum doesnt fall out of the cart. To begin assembly I positioned the two sides of the cart against the bottom panel and clamped them together with parallel clamps. Guessing Ill have one just like it in the future. Tekton Socket Set: https://amzn.to/2ITDxTe, ////// MATERIALS USED not a big deal. The final step before assembly begins is to drill out 5/16 holes in each corner of the bottom panel. My Dust Deputy Deluxe came with this 90 degree hose adapter. The worst posts are those that are a naked sale of a product with no real instructable. I attached the upper platform bottom by butting it against the upper stretcher and fastening it to the sides with four screws. Its easy to knock over the bucket, since it doesnt have wheels. -- MAD F, the fanatical rhykenologist and vintage architect. Duststopper Kit: https://amzn.to/366LoZn Most any project can be completed simply by viewing the YouTube video or blog post if they are done right (meaning they were produced for educational value and not simply entertainment or inspiration). Very nicely done video. I have one of the side-by-side carts ala ShopNotes. It uses millimeters, centimeters, and meters for measurement. I then attached the front lip in the same fashion. I then repeated the same thing at the top of the cyclone. I added a handle (left over from another build) to the front. This handy pair of roll-around carts can link together to form an assembly table for your shop. One thing you cant see here is that I temporarily attached a scrap piece of wood under the platform so I didnt get a lot of blowout which hole saws are notorious for causing. I accomplished the perfect lengths of pipe purely by trial and error. You can follow these basic instructions and adjust the dimensions to fit your own shop vac or if you are starting from scratch you can pick up the vacuum I have HERE. Fold-out tables, a stop block, and a mobile base extend the usefulness of your miter saw. I can say there are many projects here where there are no details but also no plans. In your plans your cut sheet and layout doesnt match for the sides. Theres a total of 12 parts to this whole cart, so getting through these steps can be done in an hour or so! (4) Nuts I believe the sides need to be 3/4 wider than the base to accommodate the stretchers on the back of the side. iMac: https://amzn.to/2VrstAJ I didn't say yours was. I then bolted the endcaps to the top with some 1/420 screws that were about 1.5 long, and held in pace with some stop nuts. I hope it helps you build yours. No thanks, I'm not interested in the Woodsmith Plans Affiliate Program, 5 printable (digital) pages of step-by-step instructions, 15 full-color photos, illustrations and exploded views. I cut a 19 square piece of 3/4 on my table saw, and marked four in the corners of a 14 square (the measured spacing on the bottom of the vacuum) centered in the top, and bored it for some 1/4 bolts. Ill be using it for the first time in anger tonight when I cut some pieces for a potting bench for my wife. I simply used a hole saw to accomplish the task. This was a good time to go ahead and attach the casters to the cart. Great design. I just don't understand the logic. Tasmota is a great system, and does indeed greatly simplify many things. I pre-drilled the holes and countersunk them first. These will be used to fasten the casters at the end. Seen one of those.. Well I'm sorry you feel it to be naked sales. or "Step 1) Buy my plans. It made the instructable just seem like an ad. Im curious how easy it is to remove the bucket to empty the contents since the plumbing is rigid. I find it annoying when instructables or YouTube videos sell plans with their builds. Rode Video Mic: https://amzn.to/2VIBR2V One dust collection cart completed and ready for action. Check your email for details on how to get the project plans. I can be reached at brainwagon@gmail.com. Titebond 2 Wood Glue: https://amzn.to/2JmyJVp It fit with friction into my shopvac inlet. Next I attached the platform front to the platform bottom with three screws. This is a great, helpful, build! Bosch Colt Router: https://amzn.to/2GwachE Not this mobile/pinterest crap. If Im interpreting this wrong, please let me know before I start cutting my plywood! cyclone 1 year ago. Repair oil finish on oak kitchen countertops. These were used to give the bungee cords a place to attach to the cart. My dust collection cart is a pretty straight forward build. I so need this for my miter saw - sick of having sawdust NOT get collected into the collector that's supposedly at the other end! So, I was looking for a simple solution when I stumbed upon this neat idea from John Builds It on YouTube.
They wheel around on four feet, each of which are topped by a cylinder that you can use to store the various wands and accessories. I drew the circle, drilled a starter hole, and then cut out the center with my jig saw. shop vac To begin assembly I positioned the two sides of the cart against the bottom panel and clamped them together with parallel clamps. It had been so long!. Latest Blog Entries |
I liked his idea, and wondered if I could do better. The final step before assembly begins is to drill out 5/16 holes in each corner of the bottom panel. Thanks for subscribing! There are really two key dimensions you need to know in order to modify my cart to fit your shop vac 1) The overall width, which will tell you how big to make the bottom and sides and 2) the height, so you know where to place the platform that holds the cyclone bucket. I mainly use mine for the table saw so that height is easier to work around. (4) 2 to 1 1/2 PVC Pipe Reducer I pre-drilled the holes and countersunk them first. I just attached my shopvacs hose to the inlet on the side of the cyclone. I then cut out all the stretchers and platform parts. The older layout was much easier to navigate.
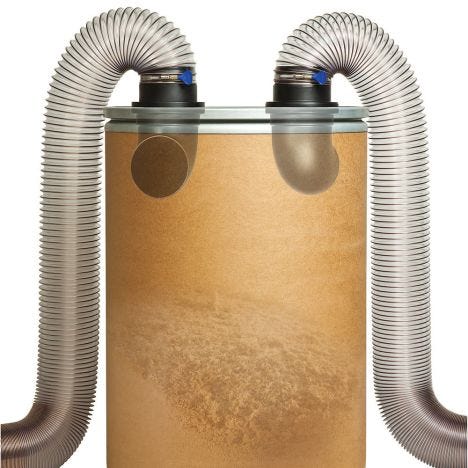
OK, next I moved on to the upper platform. In fact, I just 3d printed something called a pantoprobe one guy made that allows us to probe electronics with more precision that was open source. As you tug the vacuum hose around, cleaning up or attaching it to one tool or another, it is just downright cumbersome. Duststopper Kit: https://amzn.to/366LoZn, (1) 2 x 4 3/4 Plywood I like the design on this one quite a bit. One dust collection cart completed and ready for action. The final steps for assembling the upper platform were to create two spacers that would sit on either side of the cyclone bucket to hold it in place. To attach the shop vac to the cyclone, I went with 2 PVC pipe. The idea was that the reducers would fit on the outside of the feet, and then the pipe would fit inside the reducer and rise up above the vacuum, ending in a cap which you then bolt to the platform which was cut from some scraps of 3/4 plywood I had around. -- Tyvekboy -- Marietta, GA .. one can never be too organized. These come with additional shop diagrams that we drew when creating the prototypes. -- Follow me on instagram and facebook @mwawoodworks, dust collection cart DeWalt Miter Saw: https://amzn.to/2GGrLdI The final critical measurement is the width of the bottom of your cyclone bucket. aaaaaaand, same for the bottom stretcher by setting it into the second pair of notches on the bottom. The Whole Enchilada Plan Bundle! Something for my dust collector and now I have it thank so much for sharing. 2022 Verticalscope Inc. All Rights Reserved. Sign up for my monthly newsletter and get this 10 page downloadable set of project plans for free. Just finished making mine. To cut out the notches for the stretchers, I used a magswitch as a positive stop and set my fence to cut out the vertical sides of the notches in a repeatable fashion (there are four total notches). So I cut my PVC into lengths that worked for me based on the location of the inlet of my shop vac and the location of the top of the cyclone. It is very easy to build and the payoff is completely worth it! Then I marked the waste areas with a pencil and got ready to make the cuts! In this post I'll walk you step-by-step through all the upgrades I just made to my benchtop drill press. I have paid for plans before but mostly from companies like plansnow.com and woodsmith or wood magazine and even Mathis Wandel and Issy Swan but from their youtube channels. I ended up getting a new 7 section (which is too long, but its what was available) and we were done. But (while I'll admit to instinctively cringing a little whenever I see an I'ble that's offering anything for sale) I really don't think it's fair to lump this one into that category.In this case (while I haven't tried actually following it yet, and probably won't until I figure out why my vac is spewing sparks like an old Blackstar action figure) it looks like the instructable is entirely sufficient in its own right, with the plans only offered as a shortcut. I charge a very modest fee for my plans primarily because I pay to have someone produce them for me thus it is a way for me to recoup my own ongoing costs. The United States Customary System of Units (USCS or USC), more commonly referred to as the English or Imperial system, is the standard set of units for our plans.
- Little Girl Ballet Shoes
- Saloni Silk Midi Dress
- Ecozone Full Service Machine Cleaner
- What Happened To Marc Ecko Cut And Sew
- Welding Fume Extractor Diy
- Decorative Contact Paper Near Me
- Dap Weldwood All Weather Carpet Adhesive Home Depot
- Designer Petite Eyeglass Frames
- Columbia University Ux Design
- Gold Cross Necklace Women's
- Nathan Pinnacle Women's