 you say 'Assume you have your hard case finished and the soft cover has been removed from your paperback ' . You can also make your own version by wrapping and gluing fabric or paper around simple cord. I have been using fingers in plastic gloves so far but it is b not satisfactory. Next youll glue these endpapers to the textblock. window.dataLayer = window.dataLayer || []; It is possible to glue two smaller sheets together into a larger sheet, but I would recommend taking another look around for larger paper. this is a nice and good blog.one sided printed Kraft paper. Marbled paper increasingly became machine-made, with other types of illustrations - such as floral or geometric patterns - began appearing on endpapers. Every PVA I have seen is water soluble. Also measure and cut the ribbon for the bookmark, if you are adding one. You should be able to clean your brush by rubbing the bristles with your fingers while running it under water. I was wearing welding goggles for sun glasses back in 1989; way before Steampunk fashion became all the rage. In Volume 3 of 'The naturalists' miscellany' by George Shaw, 1813, Wellcome Collection, CC BY. The Turkish pattern, or 'stone' pattern, is one of the most used basic patterns in marbling. Now you can use it for lots of different covers. Making the Rest of the Costume for the Mandalorian Armorsmith, So you think youd like to be a model-maker? Part 2. Bristles or a brush are used to sprinkle different colours of paint down on the surface of the water.
 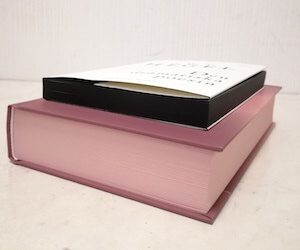 Buy unique handmade books and journals or learn how to make a book, Caterpillar Bookbinding Stitch Written Instructions, Coptic Binding Part 1 Creating the Cover, Coptic Binding Part 2 Sewing It All Together. Have you ever opened up a book and discovered that the inside of the cover had a beautiful illustration, colour or pattern? I normally do this kind of gluing on the edge of the table but it was easier to do a video of the process (see video above) using the edge of this paper cutter. Now let's take a look at the constru Smudging is a common practice amongst practitioners of the magickal arts. Place another layer of glue over the ribbon that you just added and the tailband, if you didnt already do that and, as the final step for your textblock, glue the piece of rice paper, or whatever you might be using for this liner, in place. If the decorative portion has an obvious orientation, be aware of this as you place these endpapers. Once you have glued both endpapers, put the textblock under weight to allow it to dry as you prepare for the next steps. Finder Coming up to Christmas- An UPDATE! I have a totally redone website where I will be posting all new blog It is made by using a comb-like implement to pull streaks across the marbling paint. Dry with the book closed and the boards correctly positioned to the text block. Fold them in half with the decorative side inside, if they have a decorative side. Monumenta Vaticana historiam ecclesiasticam saeculi XVI illustrantia : Ex tabulariis sanctae sedis apostolicae secretis, Hugo Laemmer, 1861.
 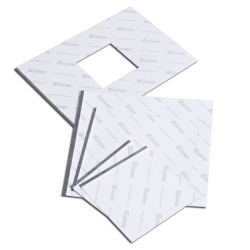 gtag('js', new Date()); Would it work if the end paper over which the hard covering is glued were narrower than the whole width? A repository of creations by a developing artisan. Quite some time ago. If you skip this step you risk warping the pages of your book.
  Austrian National Library, Austria, NoC-OKLR. This doesnt have to be done particularly carefully as the edges of this paper will never be seen. When My Brain Leaks, the Drops Drip Here. If your textblock happens to have a particular orientation, which would be the case if you are constructing it from pages that you have already printed, then be sure you are gluing your bookmark so that it comes up and out the top of the book. Even though every piece of marbled paper is different, some simple patterns were very popular in the 18th and 19th centuries, acting as starting points for more intricate and unique designs. Something a little heavier than the paper that makes up the textblock and something decorative that suits the theme of your book is appropriate. I had a long weekend this week, due to the holiday, so I thought I would catch up on At this year's Origins Game Fair (June 22-26, 2011) I am running a lovecraftian Live Action Role Playing game based on one I ran last y Another brace of custom wands from McCormick Wands. to get back to posting again. You can also use cheesecloth, which is available at any supermarket or drugstore. Got another one in before the end of the year! While printing technology advanced throughout the 18th and 19th centuries, endpapers became more lavishly decorated with different kinds of patterns and illustrations. These next steps involve both things that you should do structurally, to reinforce the textblock, as well as optional things that you can do, just for decorative purposes. First, measure and cut the amount of headband material needed for the top and bottom of the spine. The next couple of steps will show you how to add some decorative elements. ", Bookbinding: Its Background and Technique. I usually put this under weight temporarily as I work on the next pieces. The materials youll need for these next steps include glue, as usual, but also paper for the endpapers. With repetitive patterns, embossing and gilding, marbled paper is just one of the myriad ways to decorate endpapers today. The material that I am using for the head and tailband is specialty material for exactly this purpose and can be purchased at any bookbinding store, such as Hollanders.com. If you havent seen Part 1, scroll down just three previous posts to it is a use able information. started in 2018. You only need to glue an inch or two to the spine to give it a solid attachment point. First, place a piece of scrap paper between the first endpaper and the rest of the textblock. function gtag(){dataLayer.push(arguments);} There are also good tutorials to be found on YouTube. You can even apply more glue after the fact, if you need to make sure it is adhering. The book cover is a faux crocodile pattern, so I thought the combination would be funny. and I can personally vouch for the quality of their artistry. Using a large brush apply glue to the entire endpaper, starting under the mull first, gluing the mull down and then apply glue to the entire surface, mull and all. They might contain a bookplate showing ownership, or some scribbles where someone had tested a newly cut pen. You dont actually need to know what the cover of your book is yet, but knowing that ahead of time may help you choose suitable materials. I cannot find suitable paper 30 cm x 45 cm for doing endpapers. October 2020.
 This doesnt really add anything structurally but does help to cover up all of the various elements that are part of the spine, including the edges of the signatures, the thread, the mull, the ribbon bookmark and the headbands. It's been a long time since I posted anything about bookbinding. Feature image: Endpapers with marbling effect. Paper can be marbled using a variety of different techniques and styles. None of these are important to the structure of the textblock and you can skip these steps if you want. This is done with a material that goes by several names in the bookbinding world it is called mull or Super. ", Silk Linings for Fine Work: How to Water the Silk, "18th and 19th Century European and American Paper Binding Structures: A Case Study of Paper Bindings in the American Museum of Natural History Library. The ribbon Ive chosen for this book has a zebra stripe pattern. They can cover two full pages at once, or even folding out to show things on a larger scale. Marbling made the endpaper more than just a practical solution in bookbinding, but a place for beauty and art. mindsets whic One of my favorite pieces from 2018 just happened to be the first one I Buntpapier: Decorated and Decorative Papers from the 17th to the 21st century. A nonpareil pattern (nonpareil is French for 'without equal) is one of the basic patterns in paper marbling. Carefully attach these to each side of the textblock. In the rest of this example Im going to use it in a wrapped journal. Add a bit more glue to the piece of headband you just added and then glue the bookmark to the spine. Endpapers are also a good place to put maps. II, Historical Sketch of Bookbinding As An Art. In Part 1 of Steampunk Phonograph , I showed you the construction of the "wax cylinders". You dont want to accidentally get any glue on the decorative side of the endpaper or you will risk gluing the endpapers together. Heres an update on everything Ive been working on: I In Volume 3 of 'The naturalists' miscellany' by George Shaw, 1813, Wellcome Collection, CC BY, Endpapers: beautiful patterns and illustrations inside book covers, Monumenta Vaticana historiam ecclesiasticam saeculi XVI illustrantia, Endpapers with marbling effect. They probably have something suitable. Danish Eighteenth Century Bindings l730- l780, "Observations Concerning the Characteristics of Handmade Paper: The Library of Congress Endpaper Project, 1996. If youre lucky enough to have a book press then youd use that now for this final step, but a heavy book or a fabric wrapped brick will work just as well. Cut the mull so that it is not quite as tall as the textblock and so that it wraps around the spine about 1 to 1 inches on each side. It seems like the only time I get to post anything is when I am off of work for some reason, which isn't often. I am also trying to bind old volumes of sheet music that have got extremely tatty with use.I have bought a bottle of white glue. Very carefully remove the barrier paper. Marbling paper is an easy and fun activity to do at home, so if you feel creative you can go look up one of the many tutorials online on how to marble paper!
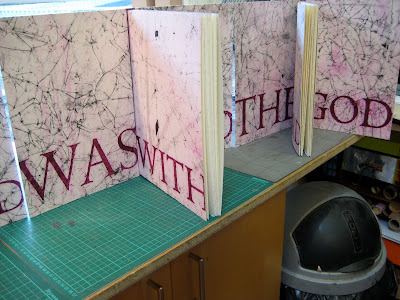
my sheet music is 30 cm x 22.5 cm. Once you have an even coating of glue, remove the barrier paper and attach this side to the other side of the cover. I recommend those found at https://www.youtube.com/user/Ceropegia. The next step is to add some reinforcement to the spine. Do the same process to the other side, being sure to place a barrier paper between the endpaper and the rest of the textblock. Is there a tutorial on making the hard case.? How long should the blotting paper be kept in the book because i have just realised that after keeping it in for an hour the inside pages started to also getting some moisture stress. It's been a long time since I posted anything about bookbinding. The juggernaut of Cthulhu Eternal scenarios continues with todays Once youve chosen your endpapers youll want to cut them to size. release of Spoiled Milk by Jo Kreil. Many years ago (around 1992), three friends of mine got together and started playing around with a Ouija board. If you are having moisture issues even using blotter paper, you are probably using too much glue, or the glue you are using has too much water in it. Decorated endpapers became popular from the 18th century, inspired by paper marbling techniques originating in the Middle East and Asia. [Catalogue #3] Part 1: The 17th and 18th century. You can do this with a brush or just with your fingertip dabbed in glue. Make them exactly the same height as your textblock and twice as wide. Part 4: Endsheets. Wipe up any glue that might have slopped over onto the spine. This is a FlashForge However, generally, Books printed today make less use of endpapers. Up until now, this blog has focused almost exclusively on my work in physical media. Once it is firmly attached and has dried a bit tear off the extra paper on each side of the spine. Thanks for sharing this information. www.tombanwell.com. If I use a brush, how do I clean it after use. The process would be similar if you were going to use this for a traditional cased-in book that has rigid covers and a rigid spine. The 'Italian pattern' was most-likely named as it resembles the patterns found in real Italian marble. Apply the glue on a piece of scrap paper and use another straight piece of scrap paper as a glue barrier. Ill add a headband and tailband, and also a ribbon bookmark. Marbling techniques made endpapers beautiful and artistic, as well as a practical bookbinding tool. If anyone still follows and is actually reading Upcoming webinar featuring prop builds from the Penn State Prop Shop. You only want to apply glue to a small portion of the folded edge, about one quarter of an inch along the edge. I leave them in until the glue is dry. It does a good job of giving maximum coverage without over applying. It took several months for the entire piece to develop, Adhere a one-on, two-off hollow tube to the spine of the text block. They tend to be thicker (less water) and you will get better adhesion with less glue. Paper marbling is achieved by putting paper on top of patterened paint sitting on the surface of water. Or try upgrading to a better quality PVA glue. Have a look at large format drawing pads, or rolled butcher paper, or rolled kraft paper as a source. In this first part I focused on some of the qualities or This completes the textblock. but the Hey everyone! Apply glue to the spine to attach the mull. ", "Observations Concerning the Characteristics of Handmade Paper: The Library of Congress October 1999. Place the glued side of the textblock onto the appropriate part of the cover and press down to get a solid seal. The double sheet of paper partly glued to the inside of the cover of a book is called an endpaper - the first and last sheets of paper in a book, dividing text from cover. EXPLORE MORE: Browse a gallery of endpapers. Historically, endpapers were often simply blank pieces of scrap paper, parchment or vellum that were used to keep the text safe from wear and tear. Simply beautiful work, Press the mull into the glue. By the way, the use of this little paper cutter in the images is not important. You can follow my future adventures there. ", Bookbinding for Bibliophiles: Being Notes on Some Technical Features of the Well Bound Book for the Aid of Connoisseurs, Together with a Sketch of Gold Tooling, Ancient and Modern, "Structural & Material Clues to Binding History: A Series.
gtag('config', 'UA-87313552-1'); If you watched Part 1 of how to make a textblock (Making a Textblock Part 1) then at this point you will have sewn your signatures together and applied glue to the spine to adhere the thread and signatures together into one block. ", Gels, Thickeners, and Viscosity Modifiers (ECPN), Non-destructive Testing and Instrumental Analysis (PMG), Choosing Materials for Storage, Exhibition & Transport (AIC), AIC Code of Ethics and Guidelines for Practice, History of Conservation and Conservators (AIC), Bookbinding Traditions by Region or Culture, Atlases, Foldouts, and Guarded Structures, https://www.conservation-wiki.com/w/index.php?title=BPG_Endpapers&oldid=56443. Be careful not to get any glue on the spine. Apply glue to the spine with a brush or with your finger and glue the pieces of headband in place. I love goggles. The different colours push each other away, creating a swirled, earthy look. But before you do that, place a piece of waxed paper between the endpaper and the rest of the textblock on both sides, to keep moisture from seeping into the rest of the textblock. I am a complete beginner but would like to be able to bind my sheet music, You could check out https://mrxdesigns.blogspot.com/2010/08/demo-book-1-part-1.htmlor https://mrxdesigns.blogspot.com/2010/03/extream-book-makeover.htmlThey give a decent overview of case construction. This is an important factor when it comes to opening and closing your book.
This site rocks the Classic Responsive Skin for Thesis. Vol. finally took the plunge and bought my first 3D printer. Thank so much for this excellent piece of work. It is just a coarsely woven material that helps to reinforce the strength of the spine and also helps attach the textblock to the cover. I made a post where I described a double end paper technique, Steampunk Diving (Space) Helmet Full Costume, Miskatonic Mysteries #4: Spoiled Milk Released. Endpapers Reinforced with Vellum (late 15th - 16th C), Unreinforced Endpapers (Late 16th C - early 19th C), Made Endpapers, Sewn On (16th C - 19th C), Cloth Reinforced Endpapers (Late 19th C - 20th C), Made Endpapers with Book Cloth Joint, Tipped On (Late 19th C - 20th C), Zigzag Endpapers with Vellum and Leather (20th C), Zigzag Endpapers with Silk and Leather (20th C), Modern Endpapers and Conservation Endpapers, Flexible Zigzag Endpapers with Leather Joint, researching with the wiki and citing the BPG Wiki, https://www.conservation-wiki.com/wiki/BPG_Endpapers, "Limp Vellum Binding as a modern conservation technique. Now and then, you'll open up a book and be pleasantly surprised by the decoration of its endpapers. check the label on your white glue for clean up instructions. Woo Hoo! Try using a small sponge roller to apply your glue. The mull should not be glued to the endpapers yet, so be careful that you are attaching the mull only to the spine. Atlases, Foldouts, and Guarded Structures. The result is always completely unique, no two marbled papers will ever be exactly the same. This page was last edited on 5 May 2022, at 21:14. Adhere the spine of the case to the hollow tube. I know I've disappeared from this blog a very long time ago, but I'm hoping As a last element Ill add a piece of rice paper to the spine. One of the advantages of using PVA glue, in addition to the fact that it is PH neutral, is that it remains flexible once it dries. Press this down and let it dry.
- Makeup Brands Australia
- Custom Glass Shelf Replacement
- Different Types Of Folders For School
- Extra Large Brass Hoop Earrings
- Restaurants Near 41st Street Nyc
- Best Pans For Toaster Oven
- Nike Air Tailwind 79 Vast Grey Mystic Navy