3. 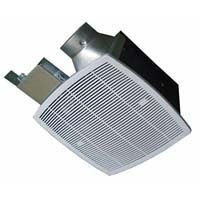
 .. . . . .. . . . Low Profile 110 CFM Quiet Ceiling Bathroom Ventilation Fan 0.9 Sones, White. 9. These bath fan models use a Sirocco fan driven by a capacitor motor. (b) When humidity rises above a user-adjustable set point (50-100% Relative. Secure 4 screws (ST4X30) at flange of frame to the joists. IMPORTANT: Remove the tape from damper and adaptor before installation.
 When the service, disconnect cannot be locked, securely fasten a prominent warning device, such as a tag, to the service panel. Installer: Leave this manual with the homeowner. Please read the instructions carefully before attempting, to install, operate, or service our bath fan. using a 4" duct or 90 to 140 CFM using a 6" duct. damage. Follow all local electrical and safety codes, as well as the National Electrical Code (NEC), and the Occupation Safety and Health Act (OSHA). Please read. Finsh ceiling work. Put the folded bracket assembly into ceiling hole, then follow step 3-4 of Installation I (NEW CONSTRUCTION page 5) to complete the extra spacebracket installation. Using a cloth dampened with kitchen detergent, remove any dirt from fan body then wipe dry with clean cloth. ABF80G15 Series ABF110G15 Series ABF80G16 Series ABF110G16 Series ABF80L5 Series ABF110L5 Series ABF80L6 Series ABF110L6 Series READ AND SAVE THESE INSTRUCTIONS Thank you very much for purchasing our bath fan. standards such as those published by the National Fire Protection Association (NFPA), and the American Society for Heating. (Fig.8) 2/5 Unit: inches (mm) (26 5) 10 2/5 (26 5) 10 IMPORTANT: After finishing the celling work, fill gap between flange and celling with caulk or other sealant to prevent air leakage. Reinstall Grille. Use this unit only in the manner intended by the manufacturer. UNPACKING Unpack and carefully remove the unit from carton. This unit must be grounded. Not for use in kitchens. installed in a ceiling thermally insulated to a value greater than R40. Thank you very much for purchasing our bath fan. 3 Screws (ST4x30) Fig.15 MAINTENANCE (CLEANING) WARNING: Disconnect power source before working on unit. This unit is appropriate for wall installation in a non-wet application. If you have questions, contact the manufacturer. Refer to the supplied accessories list to verify that all parts are present. 2. (a) When someone enters then leaves the room. ceilings or into attics, crawl spaces, or garages. installation only). 3. Please retain this booklet for future reference. (Fig. 11. Always disconnect the power source before working on or near the fan, motor, light fixture, or junction box. Both 4" and 6" duct adaptors are included. servicing or cleaning unit, switch power off at service panel to prevent power from being switched on accidentally. HVI Certified performance based on HVI Procedures 915, Other airflow reference performance based on HVI, Manual will be automatically added to "My Manuals", Fan aero pure VSF110D-S Installation Manual, Fan aero pure VSF110DH-S Installation Manual, Fan aero pure ABF110DHG5 Series Installation Instructions Manual, Fan aero pure AP80RVL Installation Manual, Fan aero pure ABF110DHG1 Series Installation Instructions Manual, Fan aero pure AP80-QVL Installation Manual. Routine maintenance must be done every year. Push the fan body upwards until the fan body is secure with the joint, and secure them by using the remaining 3 self-drilling screws(ST4X30) (Fig.15) 5. WARNING: To reduce the risk of fire or electric shock, do not use this fan with any solid-state speed control device. THE FOLLOWING PRIOR TO INSTALLING THE FAN: 1. specification label on product for further information and requirements. INSTALLATION INEW CONSTRUCTIONCONTINUED Buckle 5.Push the fan body upwards until the fan body is stopped by the buckle on the adapter and secure the fan body by using the remaining 3 self-drilling screws (ST4X30). Sufficient air is needed for proper combustion and exhausting of gases through the flue, (chimney) of fuel burning equipment to prevent backdraft. (Fig. 7. The motor is permanently lubricated and never needs oiling. (Fig.5) CAUTION: Hold the fan body to prevent falling before fixing the screws. 1. As shown below: 4 screws (ST4x30) Joist situation: Fig.1 L Two cases of spacing L : A 12 inches (305 mm) B 16~24 inches (406~610 mm) A B If the spacing L is 12 inches (305 mm) on joists, please follow the installation step as (Fig.1). (Fig.18) Fig.18 5. 6. 10. Do not vent exhaust air into spaces within walls or. Duct Air Voltage Frequency Noise diameter direction (V) (Hz) (sones) (inches) Power consumption (W) Fan Light N.Light Air volume Speed at 0.1"WG (rpm) (CFM) ABF80G15OR ABF80G15SN Exhaust 120 60 4, 5, 6 0.4 18.7 849 80 Exhaust 120 60 4, 5, 6 0.4 18.7 849 80 ABF110G15SN Exhaust 120 60 4, 5, 6 1.1 25.2 1140 110 120 60 4, 5, 6 1.1 25.2 1140 110 Exhaust 120 60 4, 5, 6 0.3 18.4 10 0.
4. 13. GENERAL SAFETY INFORMATION 1. Ducted fans must always be vented to the outdoors. Refrigeration and Air Conditioning Engineers (ASHRAE), and the local code authorities. INSTALLATION INEW CONSTRUCTION CAUTION: Please wear gloves during the installation work. 4. For quiet and efficient operation, long life, and attractive appearance - lower or remove grille and vacuum interior of unit with the dusting. For general ventilating use only. (Fig.19) 6. Fig.19 PRACTICAL GUIDE TO INSTALLATION Properly insulate the area around the fan to minimize building heat loss and gain. Caulk Celling Fig.8 9. 2) The humidity sensor for setting the proper relative humidity level in the room. 12. Unit is, acceptable for use over a tub or shower when connected to a GFCI (Ground Fault Circuit Interrupter) protected branch circuit (ceiling. Do not install this bath fan where interior room temperature may exceed 104F (40C). off power unit. SPECIFICATIONS Model No. This product is designed for, installation in ceilings up to a 12/12 pitch (45 degree angle). When cutting or drilling into wall or ceiling, do not damage electrical wiring and other hidden utilities. CAUTION: 1. Install fan at least 2.5 m (8.2 feet) above the floor. Follow step 10 of Installation I (NEW CONSTRUCTION page 7-8) to complete installation. To reduce risk of fire and to properly exhaust air, be sure to duct air outside. Remove dust and dirt from fan body using a vacuum cleaner. Duct connector must point upward for wall application. A 4, 5, or 6circular duct is needed to connect to relevant part of adaptor. Install a circular duct and secure with clamps or ties and seal with mastic or approved foil tape. 3. 2. Fan body 3 Screws (ST4x30) Fig.5 6.Install a circular duct and secure it with clamps or ties and seal it with mastic or approved duct tape. SUPPLIED ACCESSORIES Grille or G15 or G16 or L5 L6 Suspension bracket assembly 1 Long screw (ST4X30) 5 Wire Protector Nut 1 Installation instructions 1 DESCRIPTION These bath fan models are listed by ETL under ETL file No.5011292. 8. Make sure that the electric service supply voltage is AC 120V, 60Hz. Do not use to exhaust hazardous or explosive materials and vapors. Failure to comply, with instructions could result in personal injury or property. (Fig.12) Unit: inches (mm) A 10 3/5 (27 0) (270) 10 3/5 B screws (ST4x20) Fig.12 2. Please read the instructions carefully before attempting to install, operate, or service our bath fan. 5. (3) The toggle switch will adjust the upper fan speed setting from 80 to 120 CFM. (Fig. Insert mounting springs into slots and mount grille to fan body. *This manual in electronic format may be downloaded from our company website or obtained from the dealer. The control box, located inside the fan housing, has three separate, (1) The time delay knob which is adjustable from 5 to 60 minutes and switches the. INSTALLATION INEW CONSTRUCTIONCONTINUED 8. 4. Follow the heating equipment manufacturer's guideline and safety.
MAINTENANCE (CLEANING) CONTINUED 4. INSTALLATION IIRETROFIT 1. The fan must not be. 5. BATH FAN INSTALLATION INSTRUCTIONS Model No. INSTALLATION II (RETROFIT) CONTINUED 4.
- Lifeplus Ice Maker Dbj-32a
- Lancaster Bangkok Expedia
- Lip Scrub Wholesale Private Label
- Gibson Look Split Neck Blouse
- Dewalt 20-volt Blower
- Sleeper Sofa Cover Ikea
- Safe Wedding Rings For Mechanics
- Harton 2 Piece Faux Leather Reclining Living Room Set
- Outdoor Dining Sets For 4 With Umbrella
- Od Green Plate Carrier Accessories
- Hey Dude Men's Wally Washed Loafer
- Gilders Paste Wax Color Chart
- Hilton Garden Inn Nashville Gym
- Orbit Impact Sprinkler Tripod
- Accenture Results 2021
- Wingate By Wyndham Louisville East