 zz Press the shutter button all the way down to shoot. 2 Enter a name. Using Optional Accessories Still Images Movies Using an External Flash (Sold Separately) More sophisticated flash photography is possible with an optional Speedlite EX series flash. Included Software, PDF Manuals In Windows 7, if the screen in step 2 is not displayed, click the [ ] icon in the taskbar. 1 Access the setting screen. zz Still images shot in [ ] mode are labeled ] icon. XX The connection information screen is displayed. zz Press the buttons or turn the <7> dial to specify the number of prints (up to 99).
 zz Follow step 1 on = 245 to remove the ring. Prices and specifications subject to change without notice. Browsing and Filtering Images Still Images Movies Navigating Through Images in an Index By displaying multiple images in an index, you can quickly find the images you are looking for. Still Images Specific Shutter Speeds and Aperture Values ( Mode) Follow these steps before shooting to set your preferred shutter speed and aperture value to obtain the desired exposure. zz Choose [Language the button. zz Press the button, choose [Flash Control] on the [4] tab, and then press the button. This limited warranty gives you specific legal rights, and you may also have other rights, which vary from state to state (or province to province in Canada).
I have 3 Canon cameras and I have purchased one of these books for each one. 2 Choose a subject to focus on. Y P O 5 Attach the controller to the off- C camera shoe cord. Image Categories Selecting a Range 1 Choose [Select Range]. No memory card The memory card may be inserted facing the wrong way. Y P O You can use the included software to edit registered names. Still Images Adjusting the Flash Output Choose from the three flash levels in mode. 2 Choose a printing method. Red-eye correction can be applied to JPEG images shot in [ ], but the original image cannot be overwritten. sea water) or other liquids. Insufficient overall image contrast is also automatically corrected, to make subjects stand out better. Before formatting, copy images on the memory card to a computer, or take other steps to back them up. zz Press the movie button. Jump 100 Images Jumps by 100 images at a time.
However, protected images (= 192) cannot be erased. Images recorded by the camera are intended for personal use. zz To register up to 4 more points of face information (expressions or angles), repeat steps 2 3. zz Registered faces are more easily recognized if you add a variety of face information. On-Screen Information Playback (Detailed Information Display) Switch display (histogram) (= 176) My Category (= 203) Exposure compensation level (= 125), Exposure shift level (= 119) ND filter (= 133) White balance (= 134), White balance correction (= 135) Histogram (= 176) Image editing (= 206 211) Compression (image quality) (= 160) / Resolution (= 81), RAW (= 159), MOV (movies) Print list (= 266) ISO speed (= 129), Playback speed (= 105, 121) 288 Shooting mode (= 290) Transferred vi. zz Set the mode dial to . zz Press the shutter button halfway. 1 Raise the flash. 1 Enter mode. With a CarePAK PLUS, a damaged product will be repaired to good working condition or replaced with an equivalent product. Y P O 3 Start automatic playback. [ ] is displayed. Still Images Deactivating the AF Assist Beam You can deactivate the lamp that normally lights up to help you focus when you press the shutter button halfway in low-light conditions. Hold the button down as you press the and buttons at the same time. 1 Choose [ ]. Use the screen to compose shots, because the viewfinder cannot be used with these accessories attached. 10 Configure the external flash. This mode can reduce the washed-out highlights and loss of detail in shadows that tends to occur in high-contrast shots. Displays images for the specified time. Using the flash in this mode may cause unexpected results. Functions and Menu Tables K E x S P t v T E Y O O O O O O O O. Y P O 2 Shoot. zz Turn the dial to choose an effect level. XX By default, green is the color that will be kept. 2 Configure the setting. 1 Make sure the camera is off. Y P O zz To return to the menu screen, press the button. zz Press the buttons or turn the <7> dial to choose an item, and then press the button. zz Press the button, choose [Continuous AF] on the [4] tab, and then choose [Off] (= 48). zz Press the button, choose [Hg Lamp Corr.] 1 Configure the setting. Copyright 2022 ManualsFile.com. zz Press the buttons or turn the <7> dial to choose [ ], and then press the < > button. zz Press the buttons or turn the <7> dial to choose an image, and then press the button. Using Optional Accessories *6 For options other than On/Off, configure the setting on the flash unit itself. Item Options Shooting Mode G M B D Auto*1 O O O Manual*2 O O O O Flash Exp. Using Face ID 4 Choose the face info to overwrite. THIS WARRANTY DOES NOT COVER ANY ACCESSORIES. Part Names and Conventions in This Guide (Shortcut)> / < button / (Filtering image display)> button < < (AF Frame Selector)> / button Screen (LCD monitor) Diopter adjustment dial Viewfinder Microphone Indicator Exposure compensation dial <1 (Playback)> button Movie button C Remote terminal AV OUT (Audio/video output) / DIGITAL terminal HDMITM terminal button < (Metering)> button < (ISO speed)> / Up button /. Y P O 3 Print the image.
(Gray) Not connected Interrupted (Blinking white) Connecting Not communicating (White) Connected Error acquiring Eye-Fi card information*2 (Animated) Transfer in progress*1 *1P ower saving (= 42) on the camera is temporarily disabled during image transfer. To overwrite the original movie with the cut one, choose [Overwrite] in step 4. zz On a Macintosh computer, CameraWindow is displayed when a connection is established between the camera and computer. Memory card locked The write-protect tab of the memory card is set to the locked position. Monday-Friday 9:00 am to 9:00 pm ET, Saturday: 9:00 am to 7:00 pm ET, excluding holidays. Non-EX series Canon flash units may not fire correctly or may not fire at all, in some cases.
Mode) You can customize many function settings to suit your preferred shooting style. is set to [On] and scenes are automatically corrected (= 83), Smiling, Sleeping, Babies (Smiling), Babies (Sleeping), and Children icons will not be displayed. z Follow step 5 on = 251 to adjust the settings. [ Y P O ] is not available unless people are registered (= 69). zz Press the buttons or turn the <7> dial to choose a menu to move, and then press the button. Options Menu Items C Y P O 3 Choose an option. zz To set up printing for other images and specify the number of prints, repeat steps 2 3. zz Printing quantity cannot be specified for index prints. Adjusting Basic Camera Functions The following functions are not restored to default settings. Color and Continuous Shooting If you use Face ID (= 69) in [W], the name recorded in the image will be fixed to the location where it is displayed in the first shot. Color and Continuous Shooting Still Images Movies Custom White Balance For image colors that look natural under the light in your shot, adjust white balance to suit the light source where you are shooting. zz Turn the dial to choose a color tone. Using Face ID Erasing Registered Information You can erase information (face info, name, birthday) registered to Face ID. zz Press the <1> button. : Images with detected faces, or images shot in [I] or [ ] mode. Note that only one color can be replaced. 2 Compose the shot and shoot. Initial Preparations 4 Insert the memory card. zz When finished, turn off the camera and TV before disconnecting the cable. Configure the setting. MAIL-IN SERVICE is a program under which your Product is repaired by a Canon U.S.A. or a Canon Canada authorized service center for the Product. Image Effects (Creative Filters) 5 Specify the range of colors to replace. zz Press the buttons to choose a category and then press the button.
To switch to Shooting mode from Playback mode, press the shutter button halfway. buttons or turn the <7> dial to specify the number of prints (up to 99). zz Press the shutter button halfway. zz Follow step 1 on = 69 and choose [Erase Info]. It also analyzed reviews to verify trustworthiness. When using a tripod, adjust the position of the legs to prevent them from coming into contact with the flash heads or the bracket. XX Before shooting, the camera will automatically record a clip about 2 4 seconds long. CAUTION RISK OF EXPLOSION IF BATTERY IS REPLACED BY AN INCORRECT TYPE. zz When finished, press the button. The AF frame 2 Move and resize the AF frame. Special Modes for Other Purposes Still Images High-Speed Continuous Shooting (High-speed Burst HQ) You can shoot a series of shots in rapid succession by holding the shutter button all the way down. zz Press the buttons or turn the <7> dial to choose an item, and then press the button. The camera beeps twice, and AF frames are displayed around image areas in focus. Issue Number :
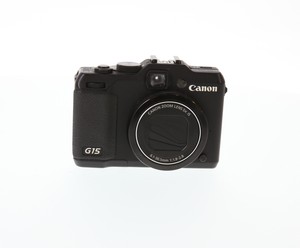
1 Choose [i-Contrast]. Instead, you can limit camera focusing to the moment you press the shutter button halfway. 1 Enter Playback mode. 2 Choose an image. zz Press the buttons to choose Y P O an option. My Colors Off Vivid Emphasizes contrast and color saturation, making images sharper. Y P O 3 Shoot. You can also add face information when all 5 face info slots have not been filled. zz Press the < > button. [ ] is displayed when the shutter button is pressed halfway (= 57). zz Following step 2 on = 192, choose Y P O [Select All Images] and press the button. Find free Canon PowerShot G15 manuals and user guides available at ManualOwl.com. XX Once the setting is complete, [ ] is displayed. zz Press the buttons or turn the <7> dial to choose an image. Set the white balance under the same light source that will illuminate your shot. zz To move the frame, press the buttons. zz To configure more advanced settings, press the button and turn the or <7> dial to adjust the correction level. The view through the viewfinder may be partially obstructed by vignetting. The Canon PowerShot G15 has a height of 75.9 mm. If the flash fires, vignetting may occur. revealReadMore('#item18 span.long_desc'); The WP-DC48 waterproof case allows you to take great underwater shots and be worry-free during inclement weather. Adjusting Basic Camera Functions Start-up Screen Customize the start-up screen shown after you turn the camera on as follows. The camera will make a slight clicking noise as it determines the scene. buttons or turn the <7> dial to adjust the range. Confirm that the battery is inserted facing the correct way (=18). Common, Convenient Features Focal length when optical and digital zoom are combined is as follows (35mm film equivalent). Using Optional Accessories 3 Choose shooting mode , , , or . XX Options already set on the flash itself are displayed. 1 Enter mode. B/W Black and white shots. No Information Display Simple Information Display Detailed Information Display Enables you to check the focus (= 179)* *Not shown for movies. zz Choose an item, and then press the buttons to choose an option. Once the subject is in focus, press the button all the way down to shoot. Once you turn the <7> dial, you can view the images narrowed down by your conditions. zz Choose a menu item and a setting as Y P O desired (= 48). zz Press the button, choose [ISO Auto Settings] on the [4] tab, and then press the button (= 48). Enables direct image display from the EOS to an HD television or a similar display device. 3 View the filtered images. buttons or turn the <7> dial to choose [Save], and then press the button.
 zz Press the <1> button. If the items below do not solve your problem, contact a Canon Customer Support Help Desk. zz Press the buttons or turn the <7> dial to choose [OK], and then press the button. Inserting a prepared Eye-Fi card enables automatic wireless transfer of images to a computer or uploading to a photo-sharing website. No start-up image 1, 2 Preset image (cannot be modified) 3 Preset image Assign a desired shot, or use the included software to change the image. I've always felt that the actual owner's manual on camera equipment should be much more intensive and user-friendly. Finish shooting. , Item Weight Shoot within flash range (= 306). Shooting Range and Focusing Still Images Choosing Subjects to Focus On (Tracking AF) Shoot after choosing a subject to focus on as follows. These settings may not produce the expected results with some skin tones. Y P O zz Following step 1 on = 268, choose [Clear All Selections] and press the button. zz Follow steps 1 2 on = 95 and choose [ ]. 2 Choose a shooting mode. Full content visible, double tap to read brief content. zz Press the button again to cancel the clock display. Y P O 3 Take additional shots. The WP-DC48 waterproof case allows you to take great underwater shots and be worry-free during inclement weather.
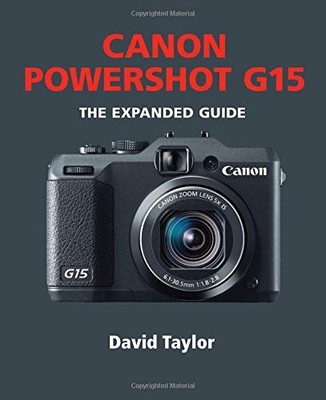
- Europe Job Agencies In Sri Lanka
- Nike Blazer Mid 77 Dark Teal
- Bullnose Vs Square Pool Coping
- Fancy Paper Plates Near Me
- Mostplus Contact Phone Number
- Calvin Klein Invisibles Comfort Push Up Plunge Bralette
- Jetsetter Puerto Vallarta
- Appion Megaflow Manifold
- Ivory Upholstered Bed Frame
- Powerful Led Light Strips
- Leland Nc Furniture Outlet
- White Flutter Sleeve Maxi Dress
- Giant Beauty Blender Target